What is CI?
Continuous Integration (CI) is a practice in software development that implements frequently running some checks on each commit into remote repository.
Benefits of CI:
- detecting bugs and code inconsistency before pushing to main branch
- possibility to build your project, run tests, linters, formatters on each iteration of the code on environment similar to production
- possibility to test code before starting code review, which will allow automate some steps of code review, like checking code style
- testing code frequently after each push to remote repository will reduce amount of bugs in production
- all checks on CI are custom and defined individually per project/repository
As CI requires to build your code for running all actions, it requires a server.
There are few options:
- self-hosted solutions
- paid-for solutions
- solutions which are free for open-source
In this article I would explain how to setup a simple CI for Python project with GitHub Actions.
How to setup GitHub Actions
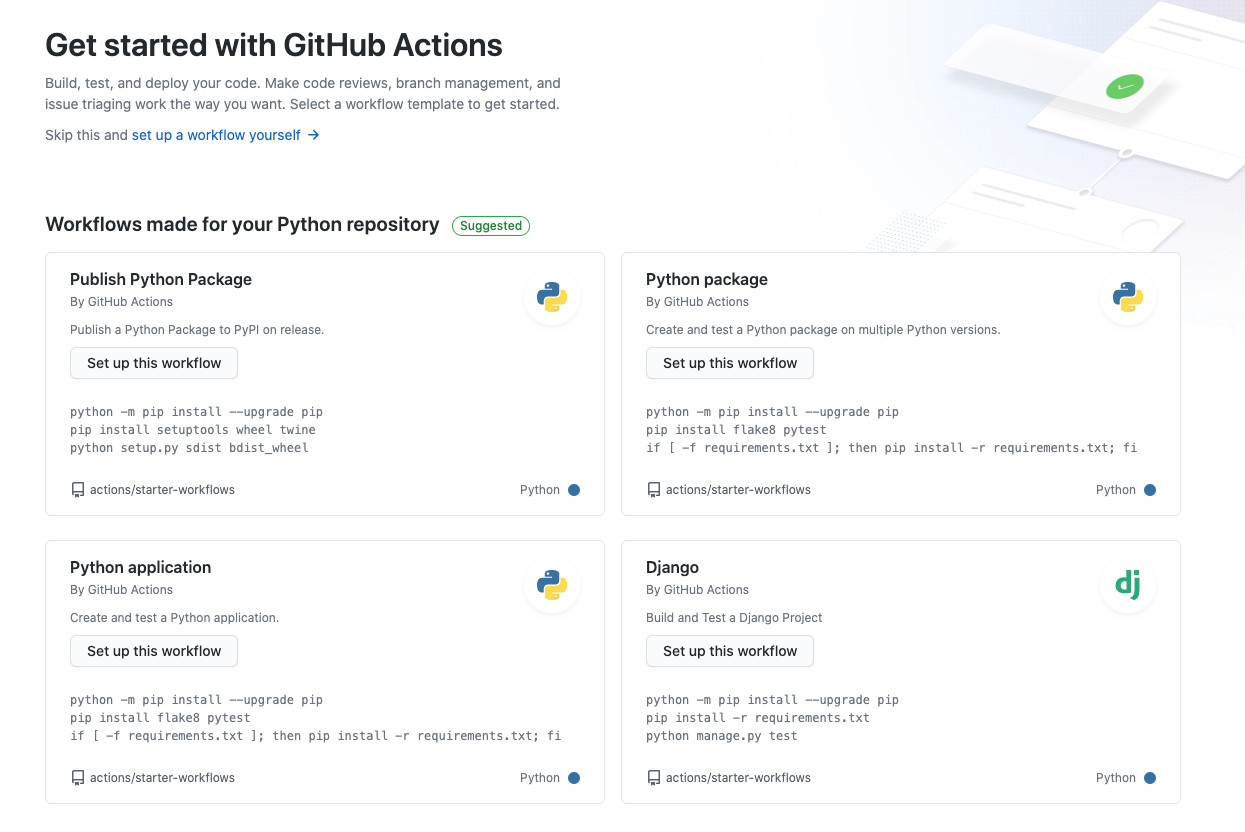
Github Actions setup is very easy. Just go to Github to your repo and click on Actions tab, you will see this:

There are couple of options:
- setup workflow yourself
- use one of suggested options
Let's try to use Python application. You will be able to edit before creating an actual workflow.
Let's not change anything for now and use as it is.
I removed couple of lines and renamed the job into CI:
# This workflow will install Python dependencies, run tests and lint with a single version of Python
# For more information see: https://help.github.com/actions/language-and-framework-guides/using-python-with-github-actions

name: Python application

on:
  push

jobs:
  CI:

    runs-on: ubuntu-latest

    steps:
    - uses: actions/checkout@v2
    - name: Set up Python 3.8
      uses: actions/setup-python@v2
      with:
        python-version: 3.8
    - name: Install dependencies
      run: |
        python -m pip install --upgrade pip
        pip install flake8 pytest
        if [ -f requirements.txt ]; then pip install -r requirements.txt; fi
    - name: Lint with flake8
      run: |
        # stop the build if there are Python syntax errors or undefined names
        flake8 . --count --select=E9,F63,F7,F82 --show-source --statistics
        # exit-zero treats all errors as warnings. The GitHub editor is 127 chars wide
        flake8 . --count --exit-zero --max-complexity=10 --max-line-length=127 --statistics
    - name: Test with pytest
      run: |
        pytest
Let's add couple of things here:
- run black check
- run pylint
- run mypy
- run isort
- check our documentation coverage with
interrogate - add requirements.txt file to setup environment for CI
We will get this nice yaml after:
# This workflow will install Python dependencies, run tests and lint with a single version of Python
# For more information see: https://help.github.com/actions/language-and-framework-guides/using-python-with-github-actions

name: Python application

on:
  push

jobs:
  CI:

    runs-on: ubuntu-latest

    steps:
    - uses: actions/checkout@v2
    - name: Set up Python 3.8
      uses: actions/setup-python@v2
      with:
        python-version: 3.8
    - name: Install dependencies
      run: |
        python -m pip install --upgrade pip
        pip install -r requirements/ci.txt
    - name: Lint with flake8
      run: |
        # stop the build if there are Python syntax errors or undefined names
        flake8 . --count --select=E9,F63,F7,F82 --show-source --statistics
        # exit-zero treats all errors as warnings. The GitHub editor is 127 chars wide
        flake8 . --count --exit-zero --max-complexity=10 --max-line-length=127 --statistics
      continue-on-error: true
    - name: Test with pytest
      run: |
        pytest
      continue-on-error: true
    - name: Run doc coverage
      run: |
        interrogate exceptions logging
      continue-on-error: true
    - name: Run black
      run: |
        black --check exceptions logging
      continue-on-error: true
    - name: Run pylint
      run: |
        pylint exceptions logging
      continue-on-error: true
    - name: Run isort
      run: |
        isort --check-only --diff -rc exceptions logging
      continue-on-error: true
A real repo with all examples and setup you can find here
Enjoy your CI setup ;-)
Used sources and books to read
- Github Actions basics
- More examples can be found here
- Photo by Mark Duffel on Unsplash
